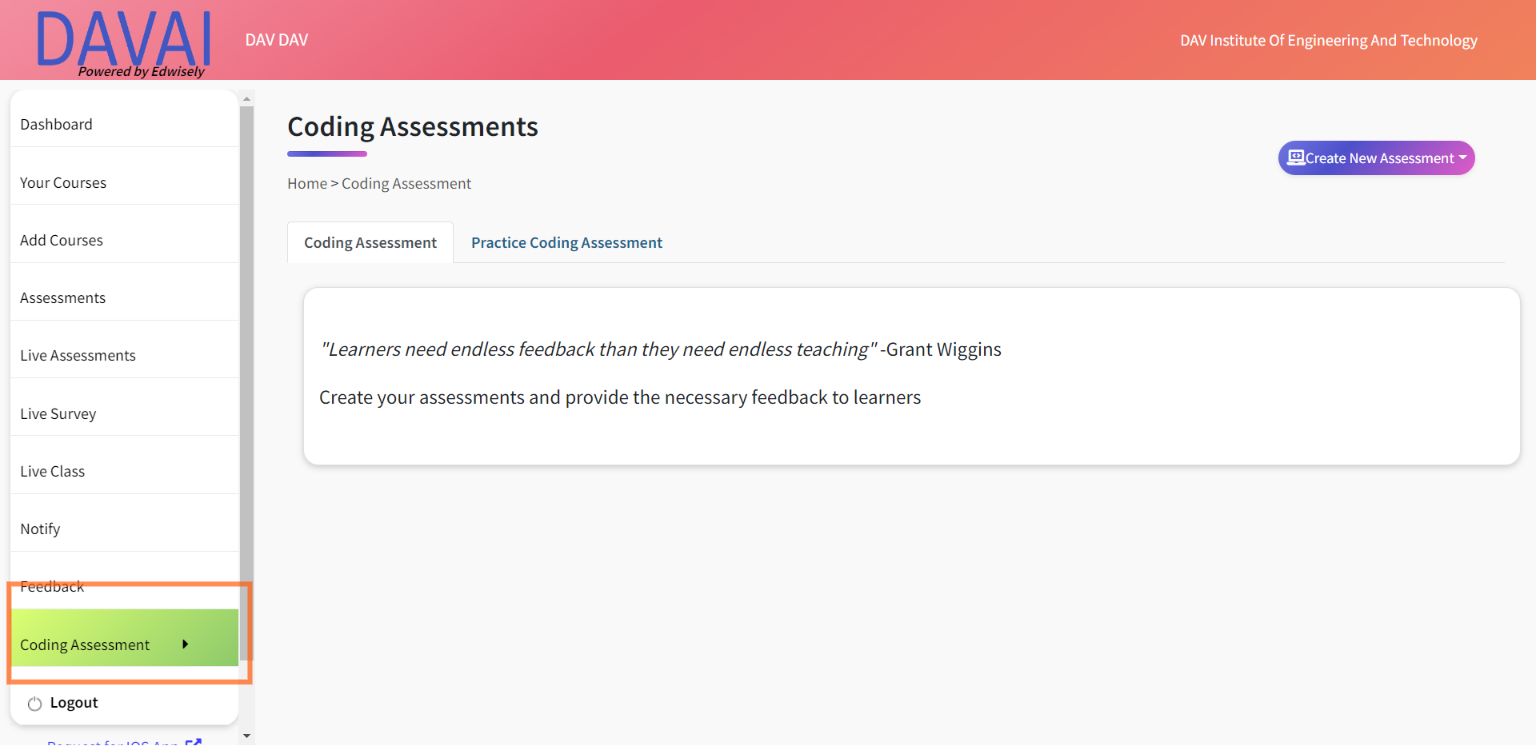
1. Select the Coding Assessment module present in the dashboard of the faculty web application.
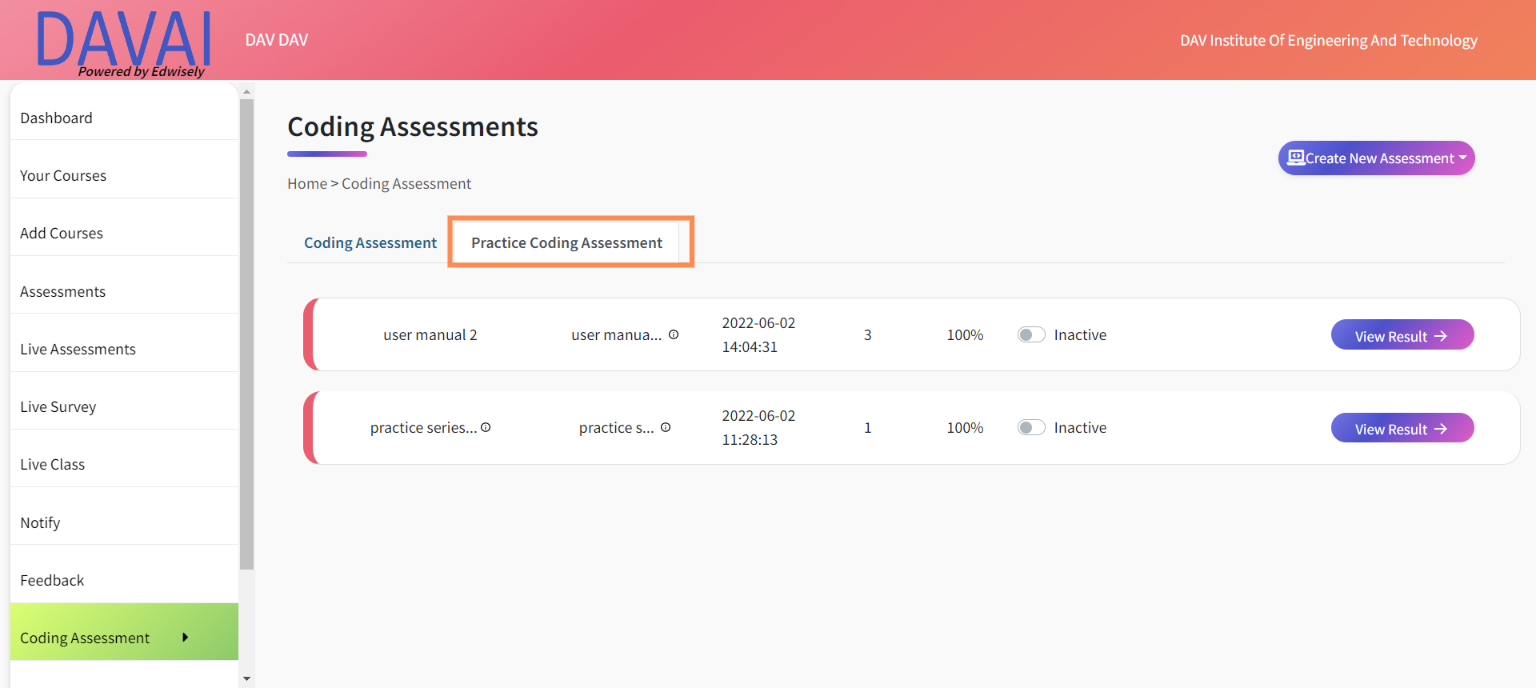
2. Select the “practice coding assessment” in the tabs displayed, to check the previously created practice tests list view.
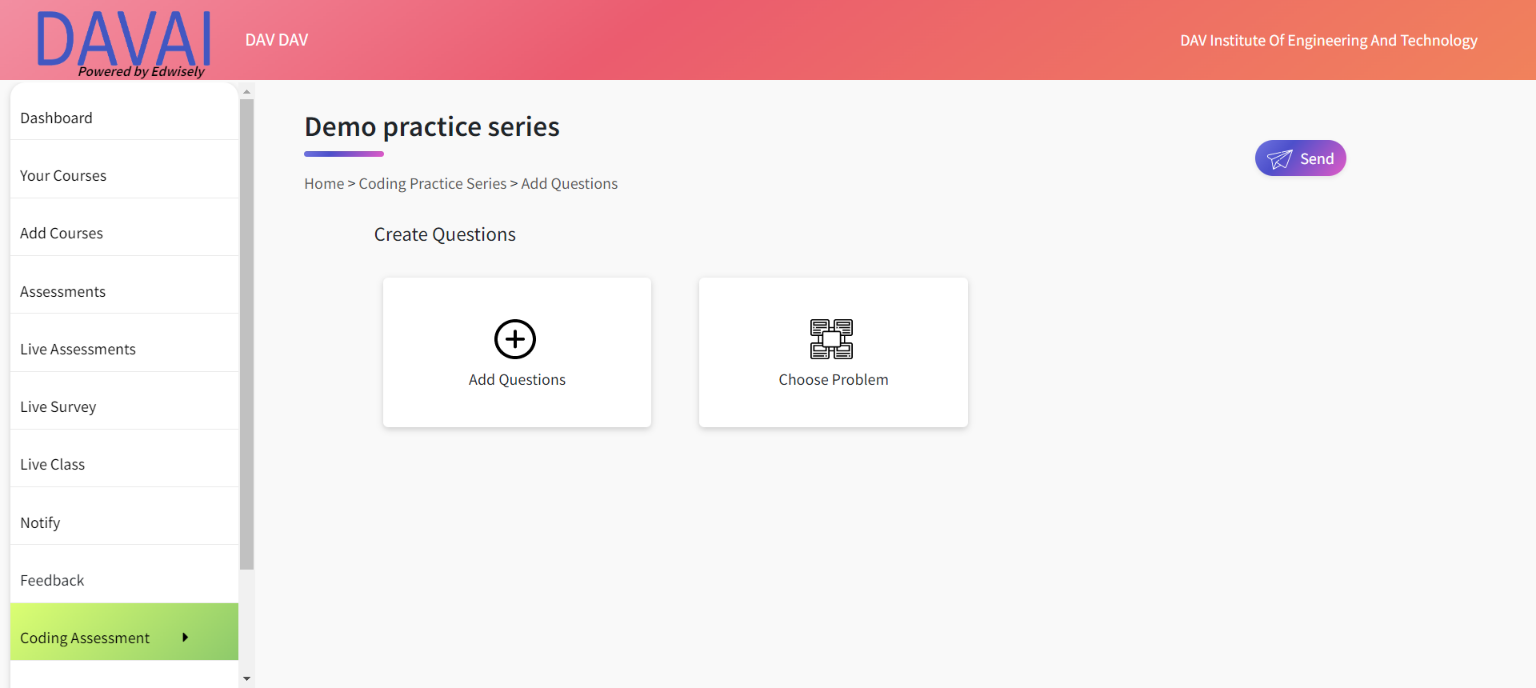
CREATING A CODING PRACTICE SERIES:
3. Select the create coding assessment button. A drop-down appears displaying the coding assessment and coding practice series options.
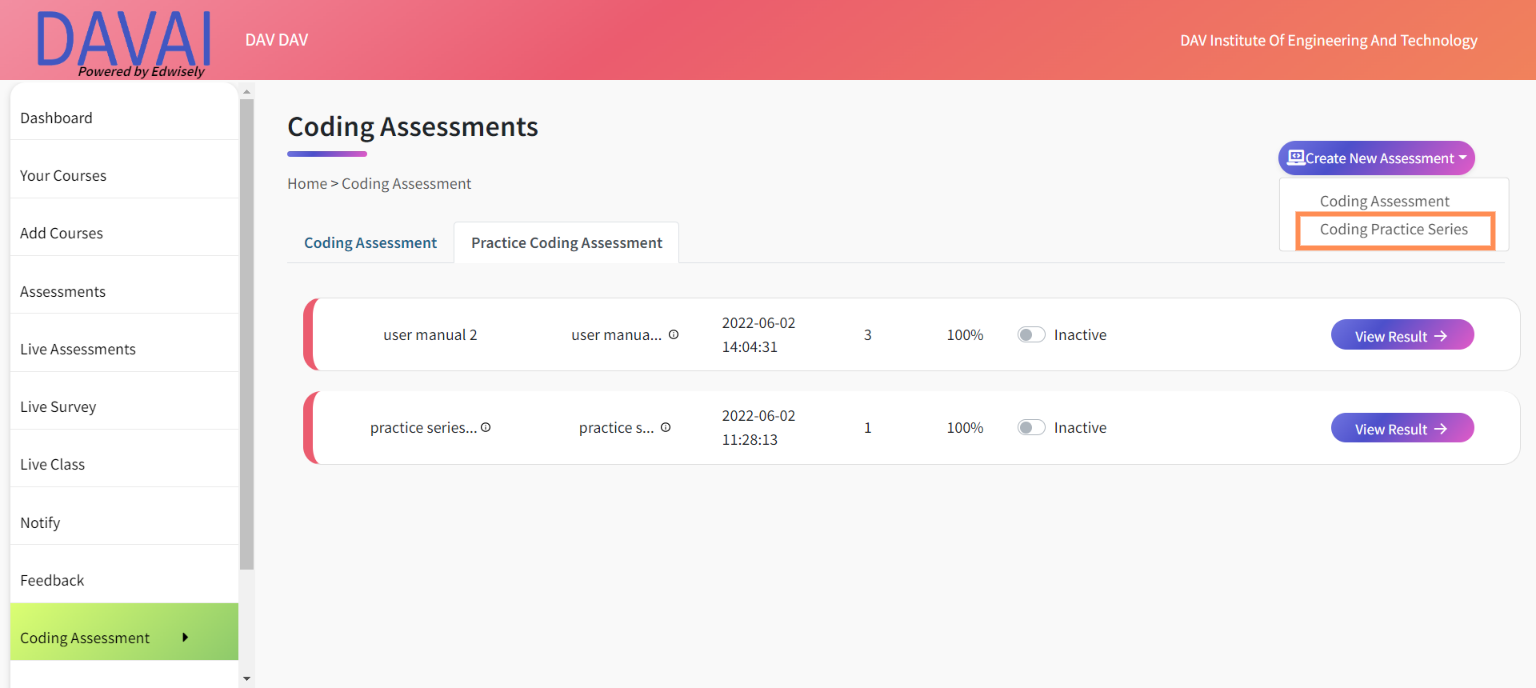
4. Select the coding practice series to create the practice test and navigate to create the practice test page.
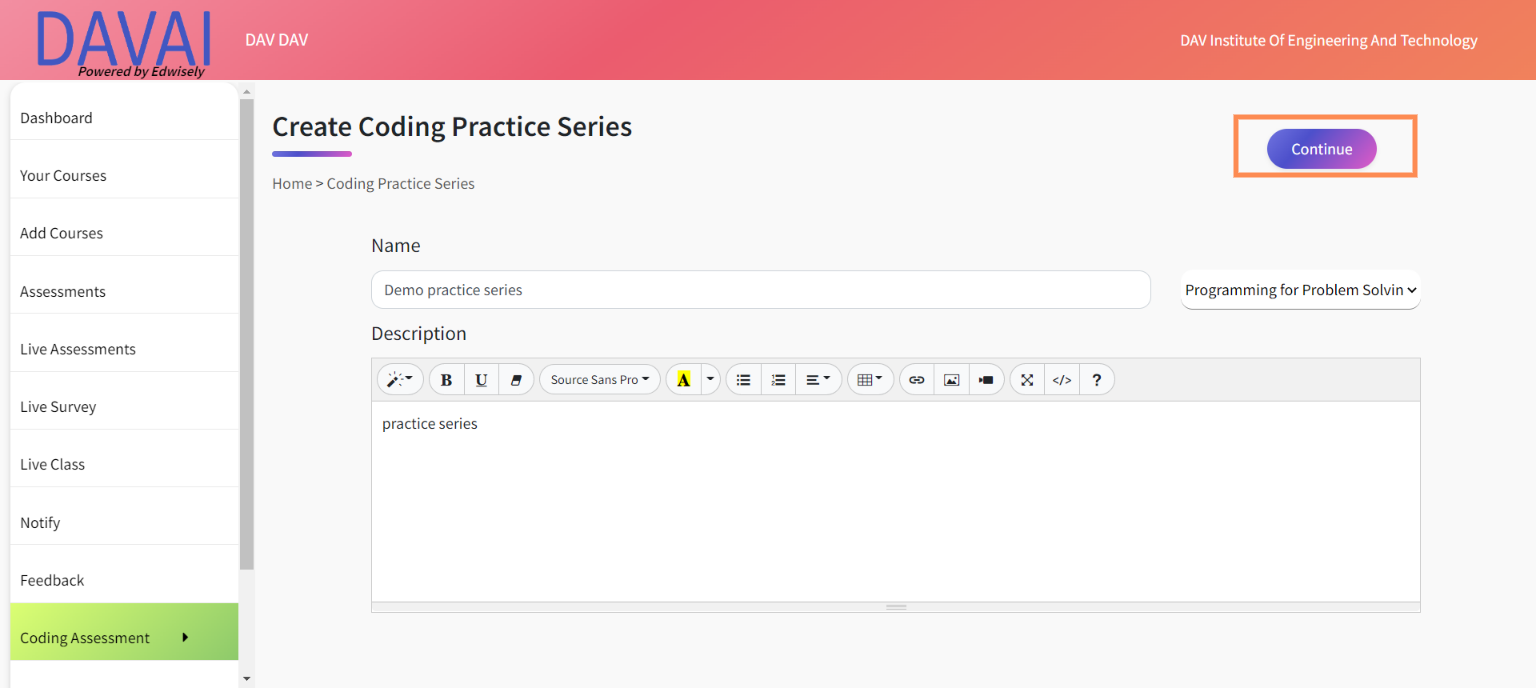
5. Enter the name, description and choose the required subject from the list of subjects given in the drop-down menu.
6. Click on the continue button to create the test and navigate to the question-adding page.
ADDING THE QUESTIONS TO THE TEST :
Add questions through add question option :
7. On selecting the add questions option, it navigates to the add question page.
8. Fill out the problem statement and other fields with required inputs. Fill in the problem description and test cases for the given coding problem.
Note: Unlike the coding assessment it’s not mandatory for the faculty to give marks for practice series.
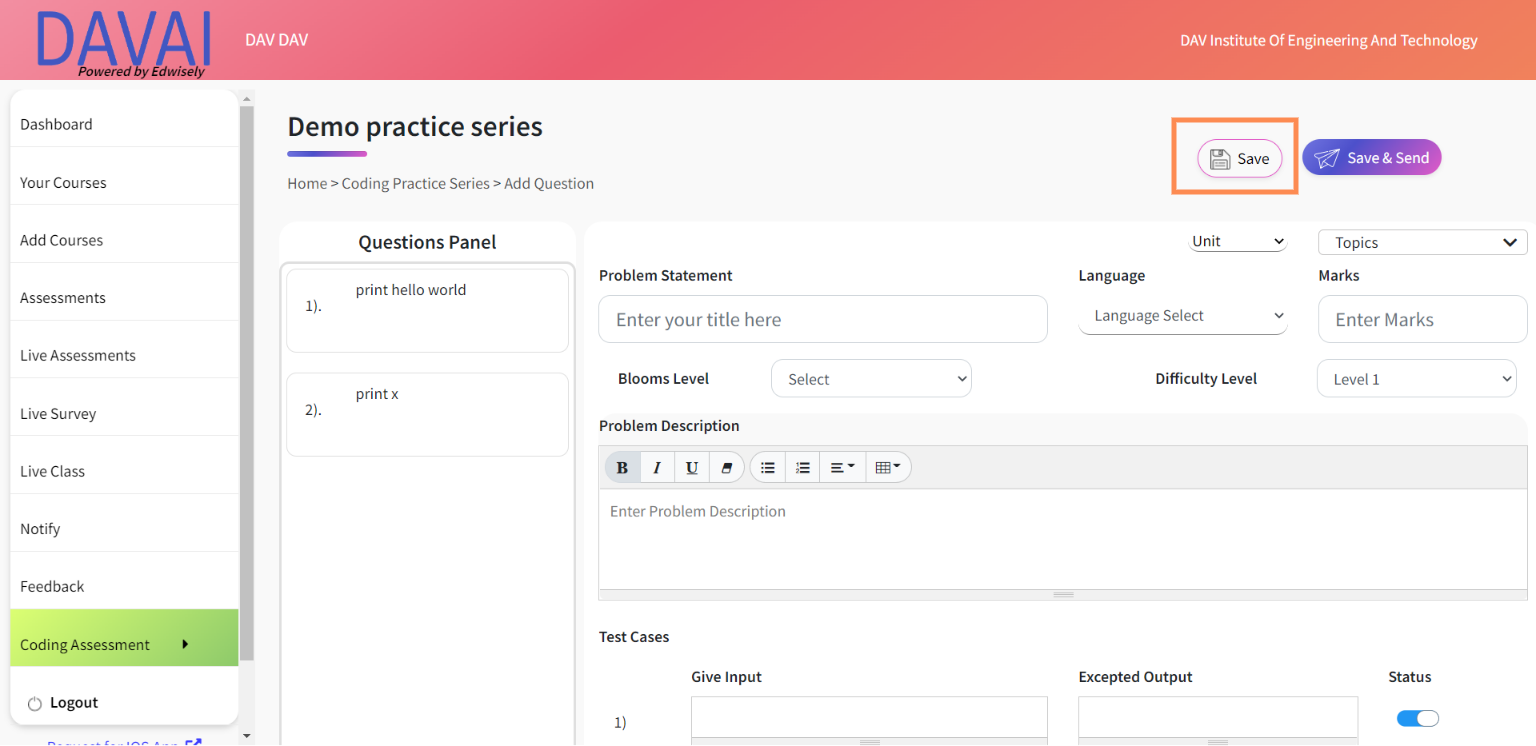
9. Once the problem has been entered click on the “done” button to add the question to the questions panel.
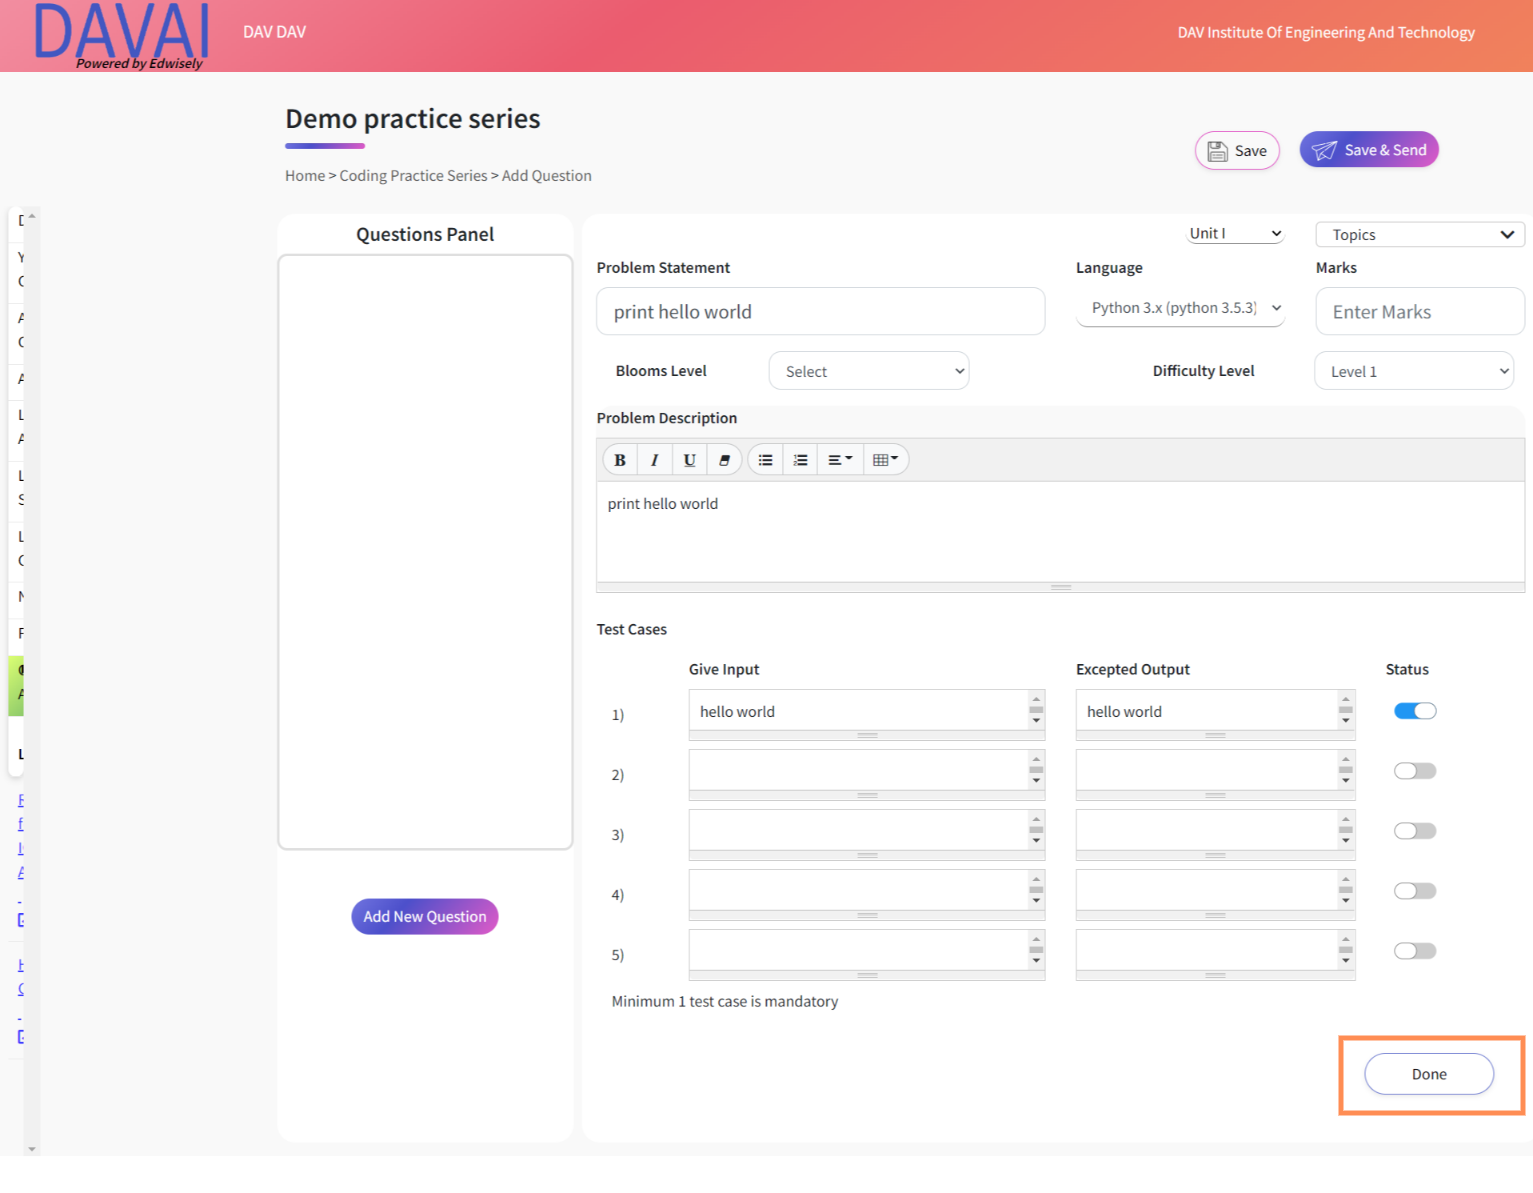
10. Once the required questions are added to the test, select the save button to save the test and send it later.
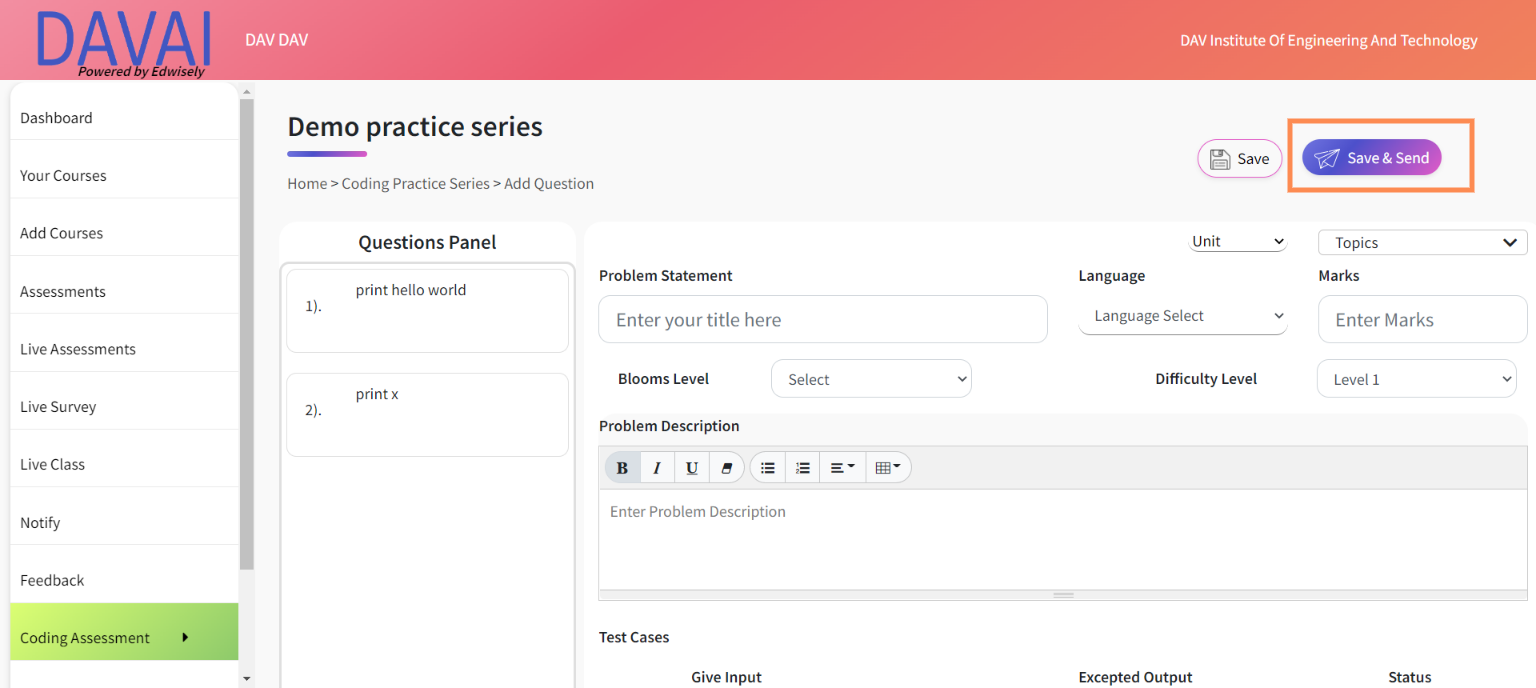
11. If the faculty wants to send the test, click on the save and send button and navigate to the send test page.
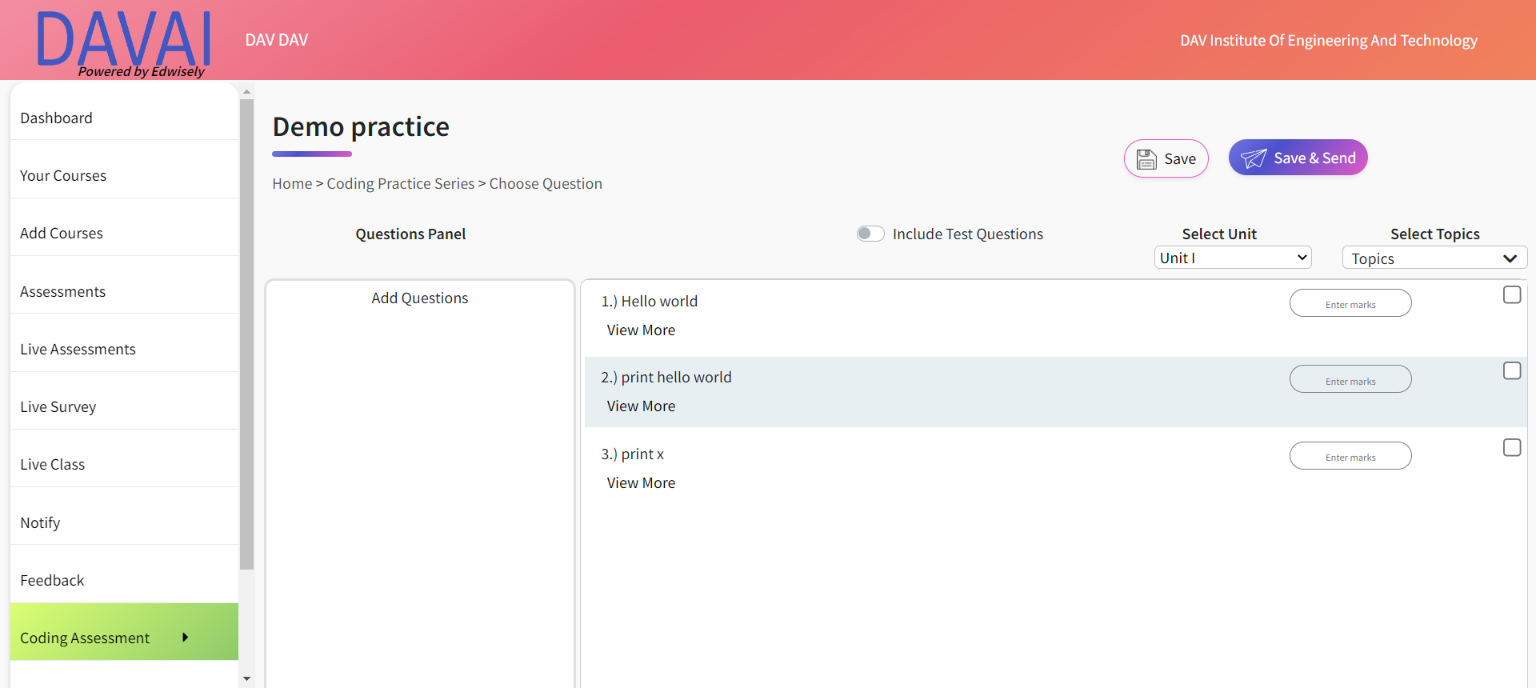
Add questions through choose questions option :
12. When selecting the choose questions option, the faculty will be able to view the list of previously added questions present in that particular subject.
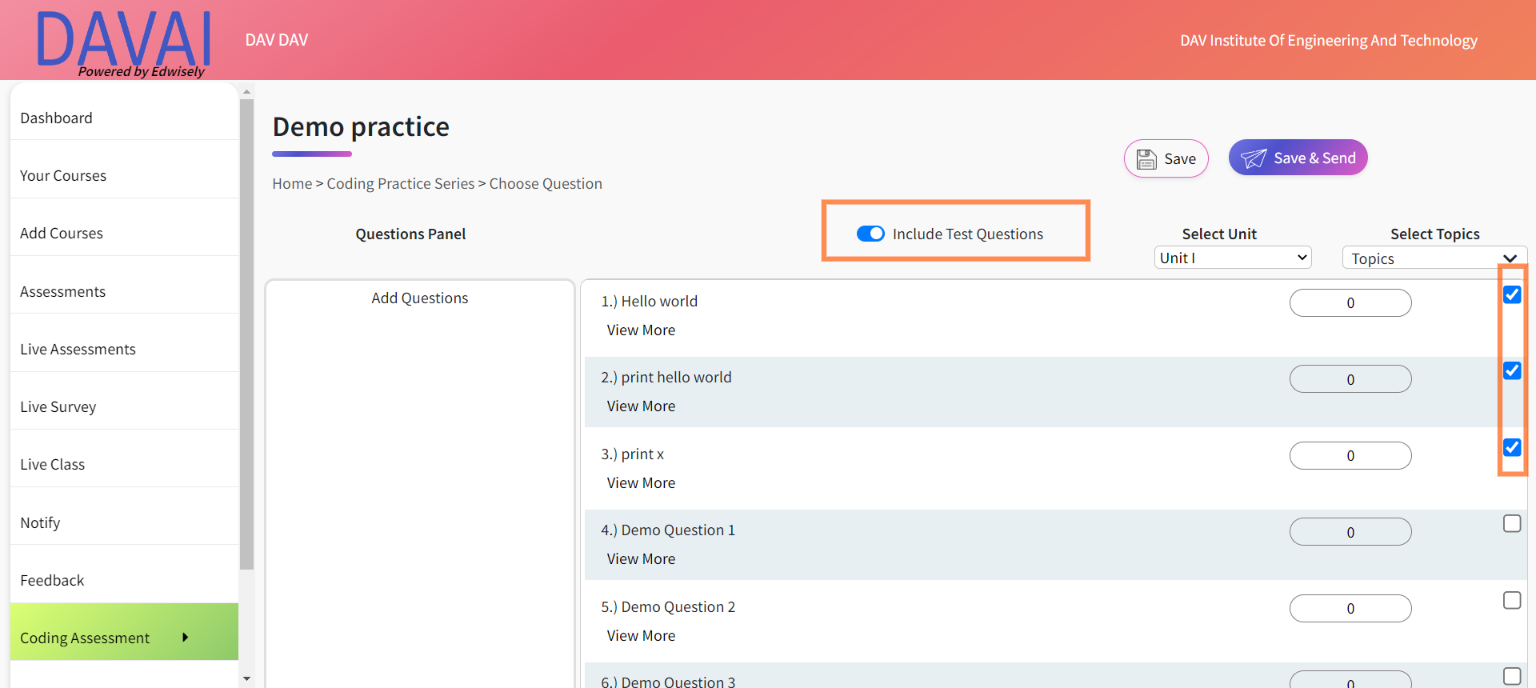
13. If the faculty intends to add questions from the coding assessment they can toggle the “include test questions” button. Once the button has been toggled faculty will be able to view the questions from the coding assessment and practice series together in the choose questions list.
- They will also be able to select the questions according to the units and topics present.
14. Select the required question and click on the Save option to save the test for the future.
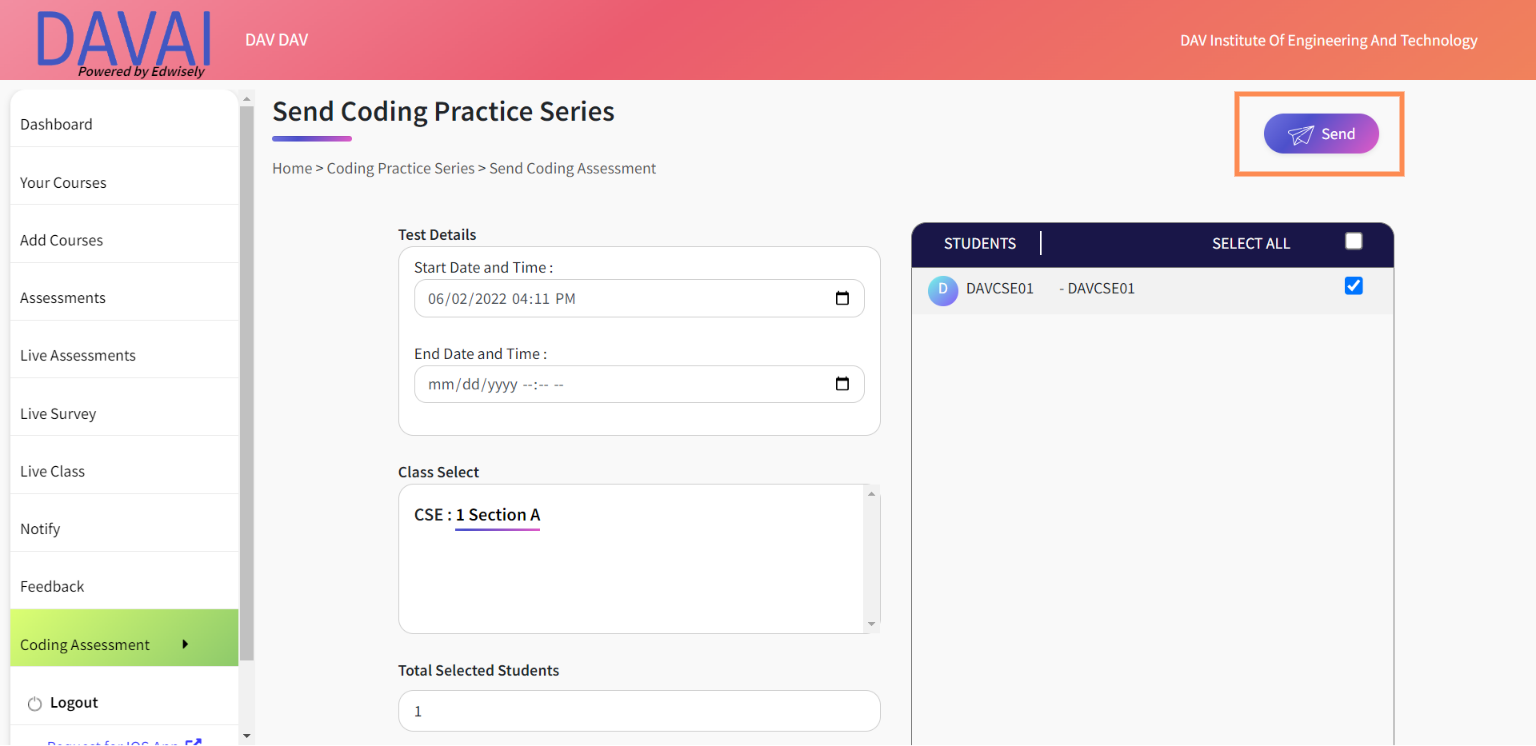
- Select the save and send option to send the test to students immediately and navigate to the send coding assessment page.
15. Enter the required start time and end time for the test, and also select the students from the list of students displayed in each section. If the start time is not given by the faculty, the current time will be automatically taken as a start time and test the gets initiated.
- The start and end time need not be mandatory to send the test, since the faculty can activate or deactivate the test anytime.
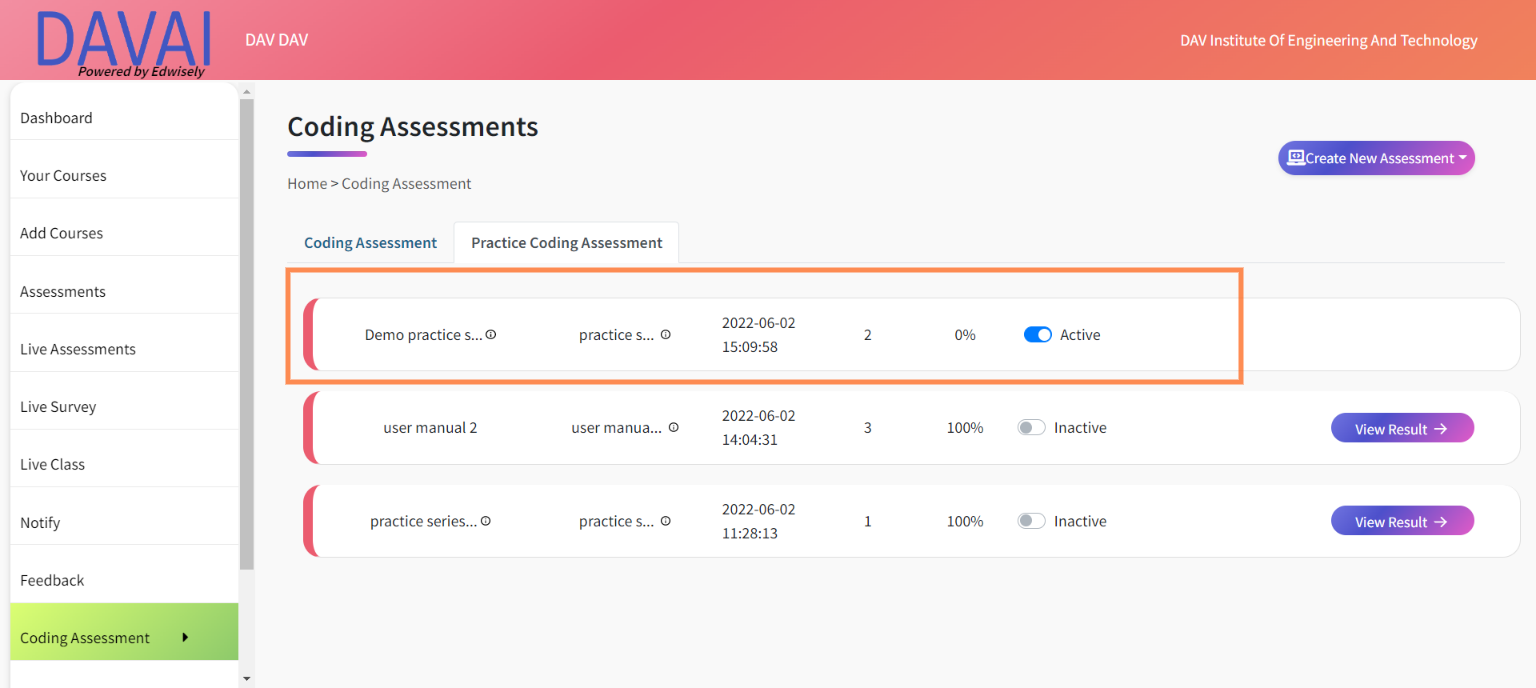
16. Once the test has been sent, the faculty will be navigated to the list view page wherein the active/inactive toggle button will be automatically activated. At this point, if the faculty has given the start time, the student will only be able to view the test and once the start time strikes, they will be able to attempt the test.
- If the start time is not given by the faculty, the current time will be taken as the start time and students will be able to attempt the test.
17. Irrespective of the end time given and students attempting the test , the faculty will be able to view the results from when the test has been started.
18. If the faculty wants to deactivate the test anytime, they can inactivate the toggle button so that the test will be closed for answering.
How to view the results page :
Filtering through view by the question:
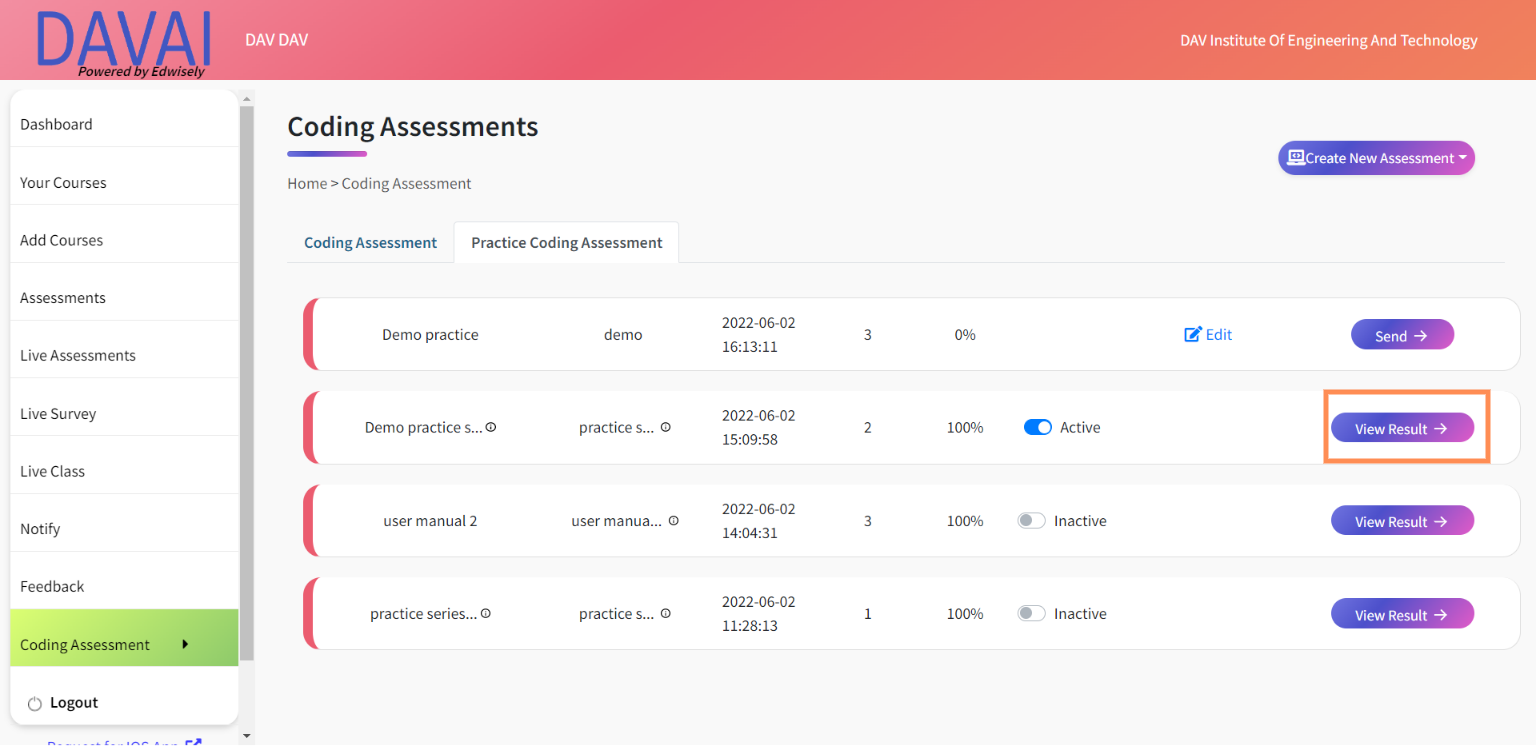
19. Select the view result button present on the list view of the coding practice series, the faculty will be navigated to the results page.
20. When filtered by the question, the faculty will be able to view the Question name, topic, bloom level details, etc.
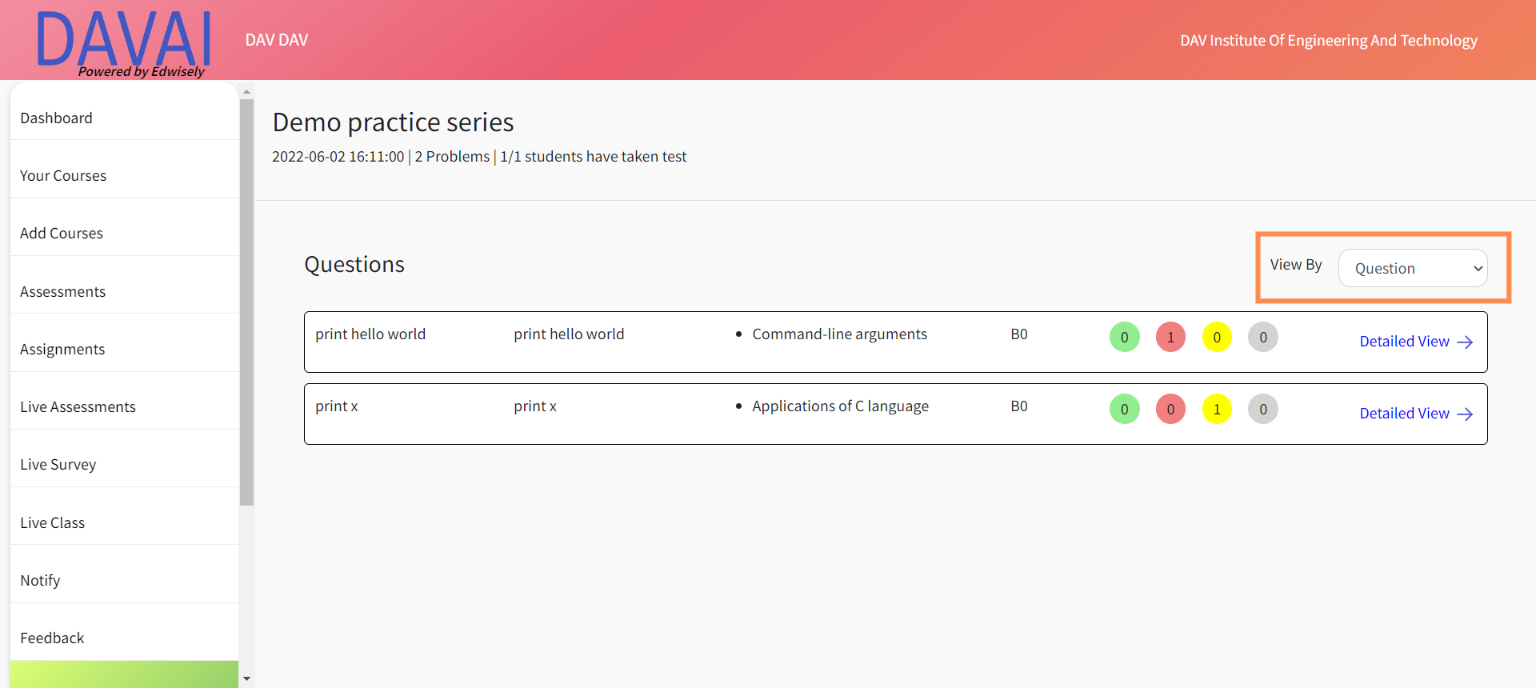
- Faculty will also be able to view the number of students who attempted correct, wrong, partially correct, and unattempted for each question. The status details can be seen when the faculty hovers around the number present.
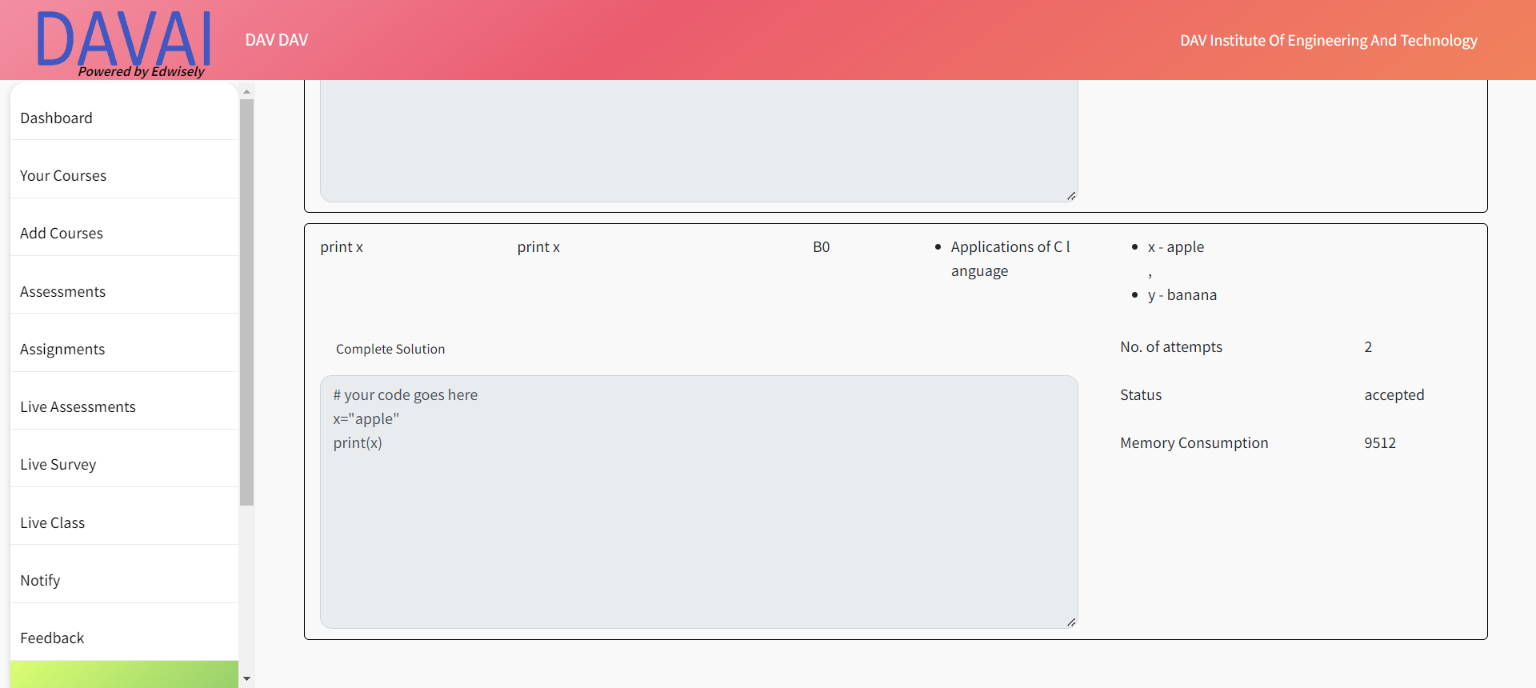
21. To get a detailed view of the results for each question, click on the detailed view button.
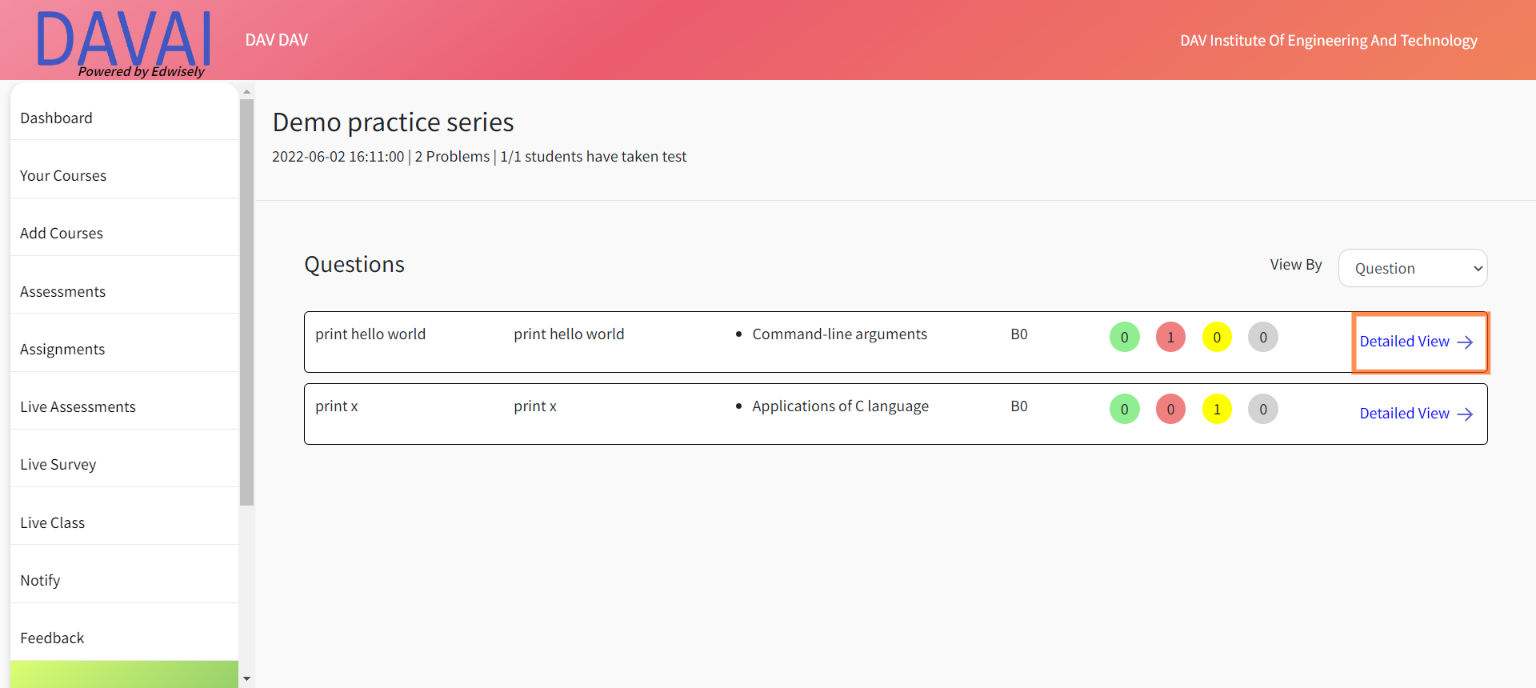
- The detailed view of the question displays the code written by each student for the selected question , memory consumed , status and no of attempts for the question.
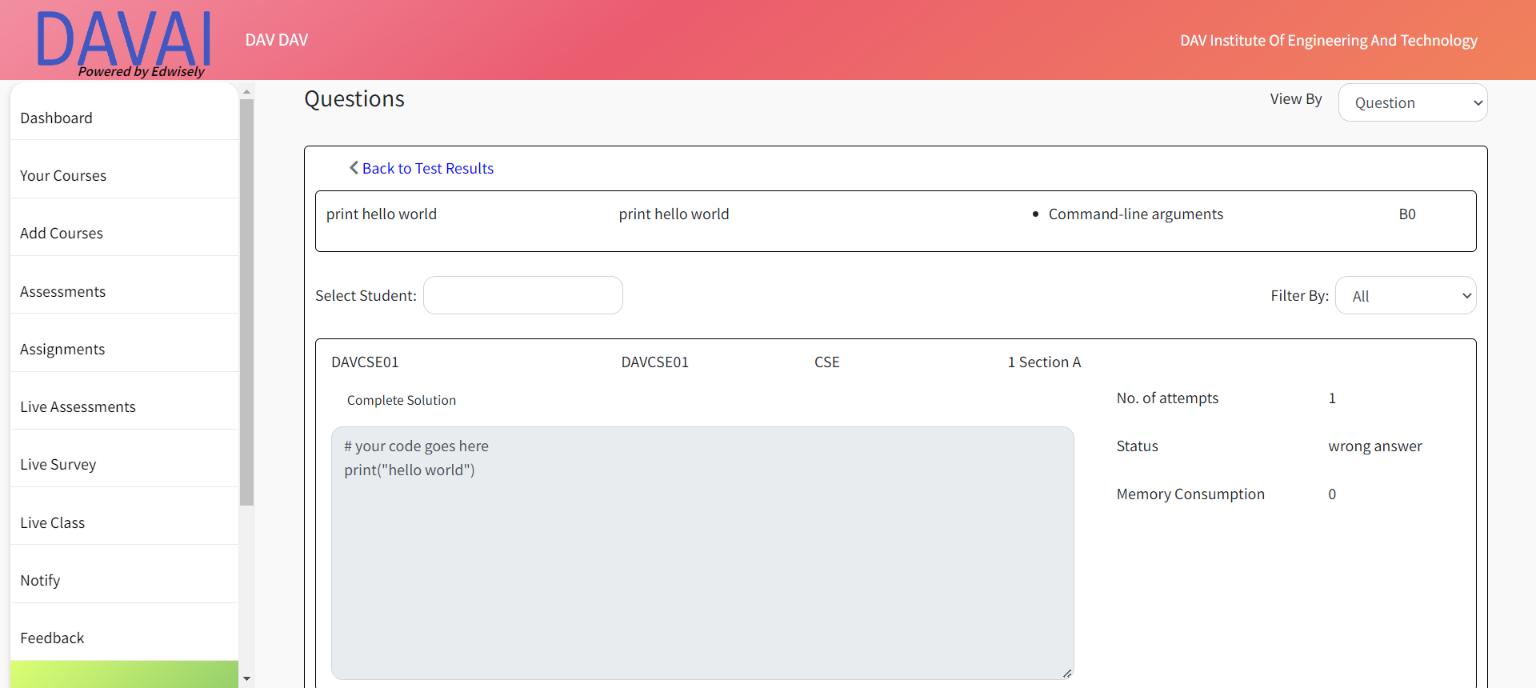
22. The faculty will also be able to filter the results for a particular according to the student roll numbers and correct, wrong, partially correct, unattempted filters as well according to their feasibility.
Filtering through view by student :
23. When filtered by the student the results will display according to the student roll numbers and results.
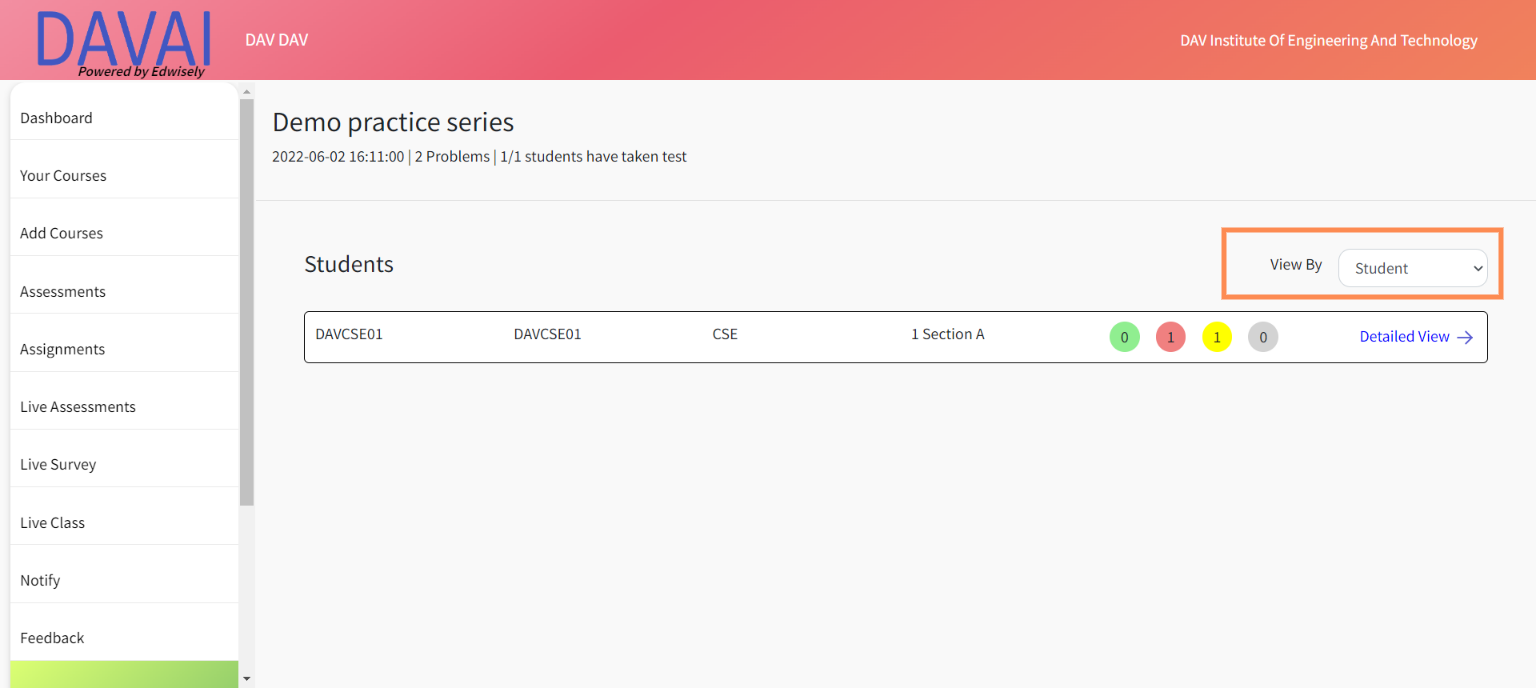
24. The faculty will be able to view the student roll number, department, section and status details, etc.
- The status details can be seen when the faculty hovers around the number present.
25. To get a detailed view of results for a particular student, select the detailed view button.
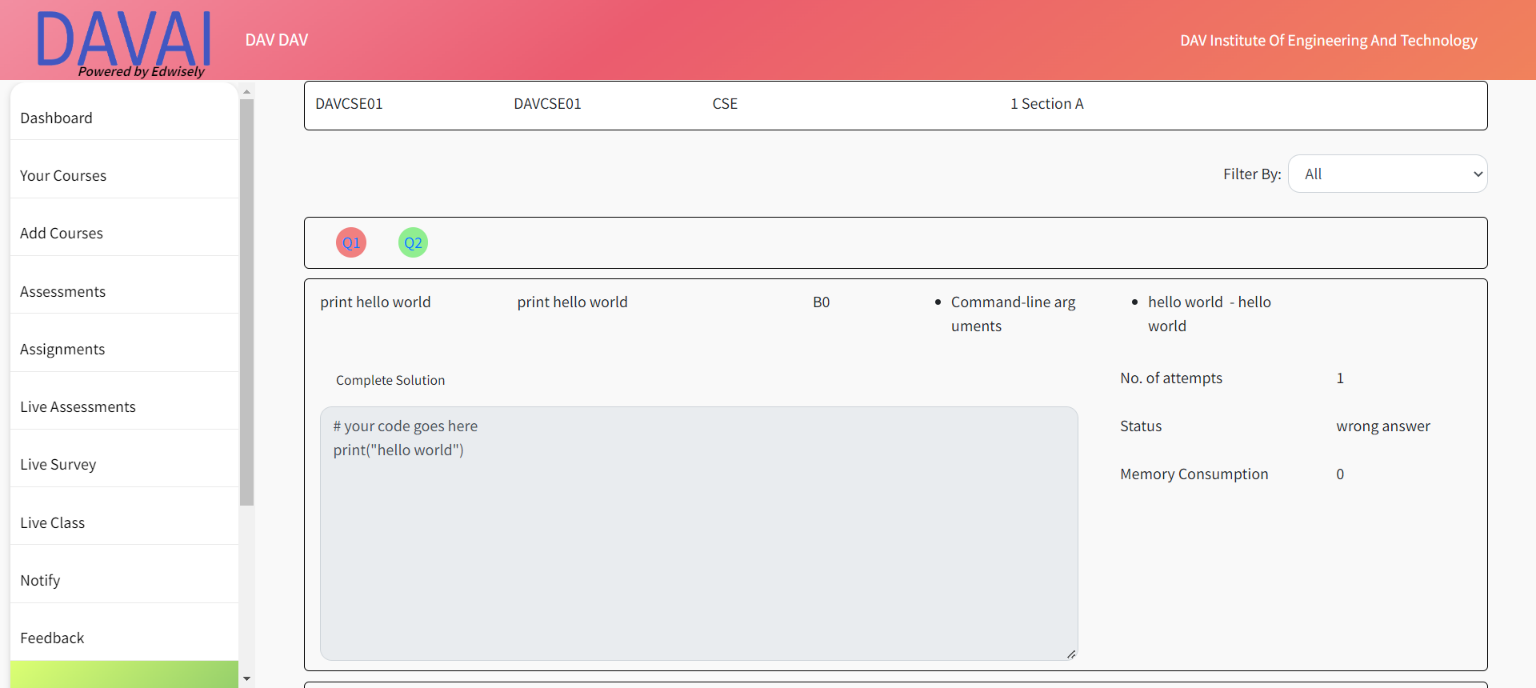
26. The faculty will be able to view the code written by the student, no of attempts, status, and memory consumption for each question.
27. The results can also be filtered according to the status of the question.


